

Quick answer: Laser welding is usually best for small letters, fine text and visible stainless-steel seams because it delivers very low heat input and minimal distortion. TIG is a strong option for clean stainless work with moderate heat control. MIG/MAG and stick welding are better suited to larger letters, internal frames and heavy structural joints, where a larger bead, spatter and more grinding can be hidden or finished. Weld strength still depends on joint design, penetration, filler material and the welding procedure—not the process name alone.
Two signs can use the same stainless-steel face, the same paint finish and the same LED system, yet perform very differently because one was welded with a precise low-heat process and the other with a heavy structural arc. For a buyer, the important question is not simply “which welding method is strongest?” It is “which method produces the right joint for this letter size, material, visible surface and installation load?” This guide compares laser, TIG, MIG/MAG and stick welding for manufactured signage.
Laser vs TIG vs MIG/MAG vs stick welding at a glance
| Factor | Laser welding | TIG welding | MIG/MAG welding | Stick welding |
|---|---|---|---|---|
| Heat input | Very low | Low to moderate | Moderate to high | High |
| Distortion risk | Lowest | Light; depends on tack sequence | Moderate; clamping is important | Highest |
| Weld appearance | Narrow and clean | Smooth and controllable | Larger bead, possible spatter | Heavy slag, spatter and bead |
| Typical signage use | Small letters, fine text, visible stainless seams | Medium letters, corners and stainless returns | Large letters, supports and internal frames | Thick steel, baseplates and hidden reinforcement |
| Finishing requirement | Minimal grinding | Light finishing | Grinding and spatter removal | Heavy cleanup or hidden placement |
| Main limitation | Tight joint fit-up and higher equipment cost | Slower than MIG and more skill-dependent | More heat and a wider visible seam | Poor cosmetic result on exposed faces |
Laser welding: best for small letters and fine text
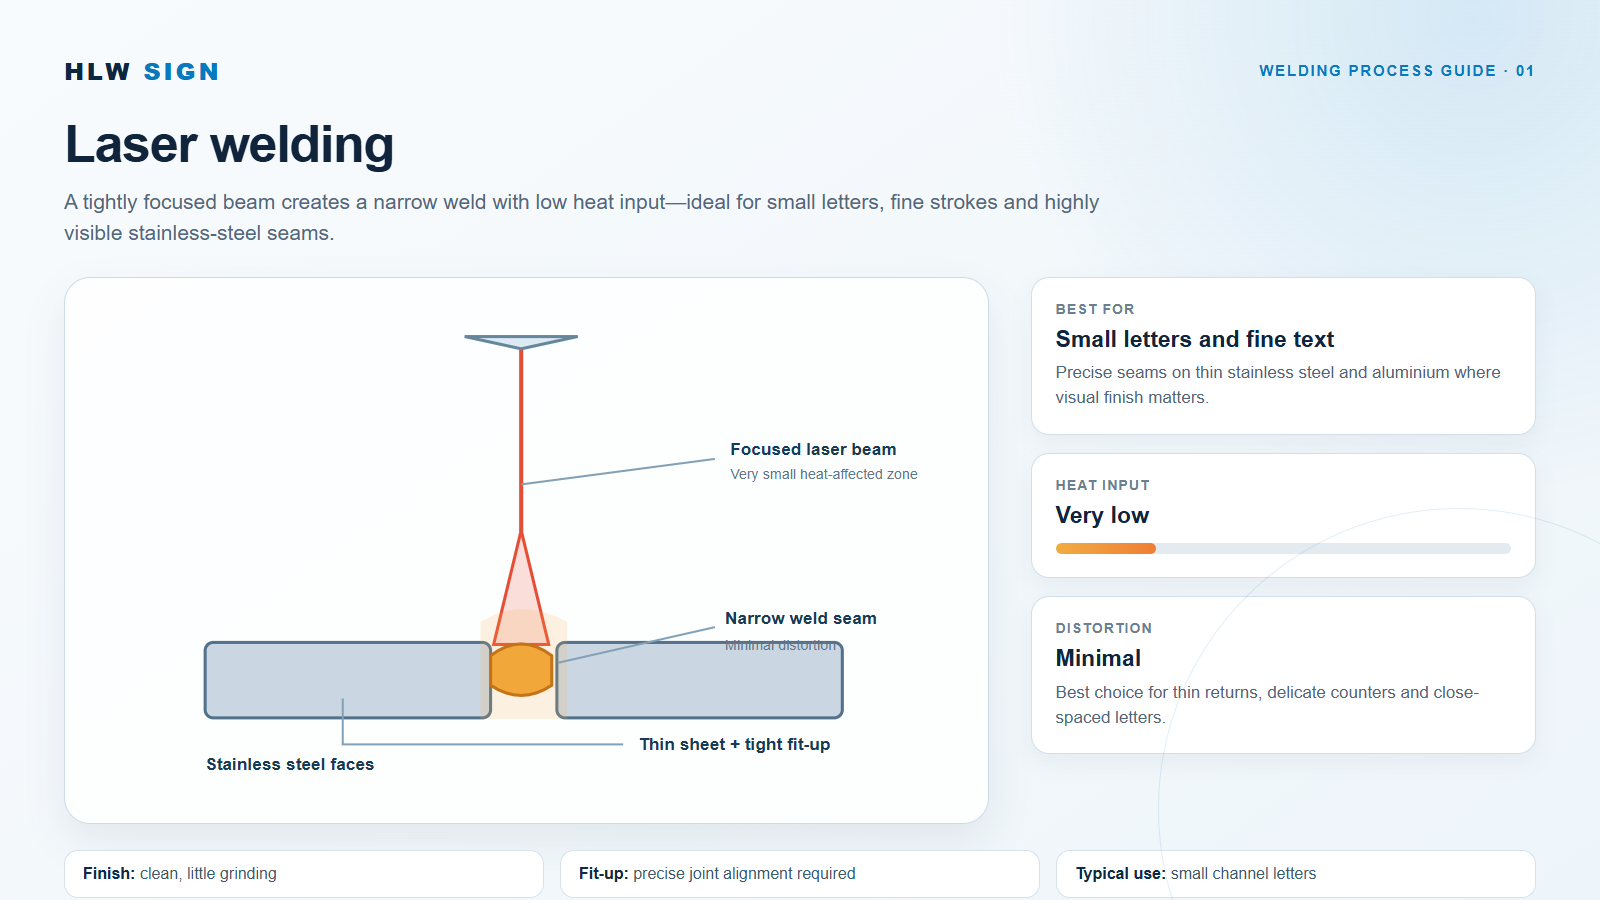
Laser welding uses a focused beam to create a narrow weld pool. In sign fabrication, its main advantages are precision, low heat input and a small heat-affected zone. Those characteristics matter when the letter face is thin, the strokes are narrow or the welded seam will remain visible after polishing.
This process is particularly effective for small custom 3D letters, tightly spaced text, delicate counters inside letters and stainless-steel seams that need minimal cleanup. A well-fitted laser weld can reduce the amount of sanding and polishing needed around corners. It also helps protect the flatness of a thin metal face when the customer expects a crisp reflection after finishing.
Laser welding advantages
- Low heat input and minimal panel distortion.
- Narrow, clean weld bead with less post-processing.
- Fast, repeatable welding on thin and closely fitted parts.
- Suitable for small letters, fine strokes and detailed logo shapes.
- Good consistency in a controlled factory fixture.
Laser welding limitations
- Joint fit-up and part tolerance must be accurate.
- Equipment and programming costs are higher than conventional arc processes.
- The process is less forgiving of gaps, contamination or uneven clamping.
- Laser safety controls must be integrated into the production cell.
TIG welding: controlled heat for stainless-steel letter bodies
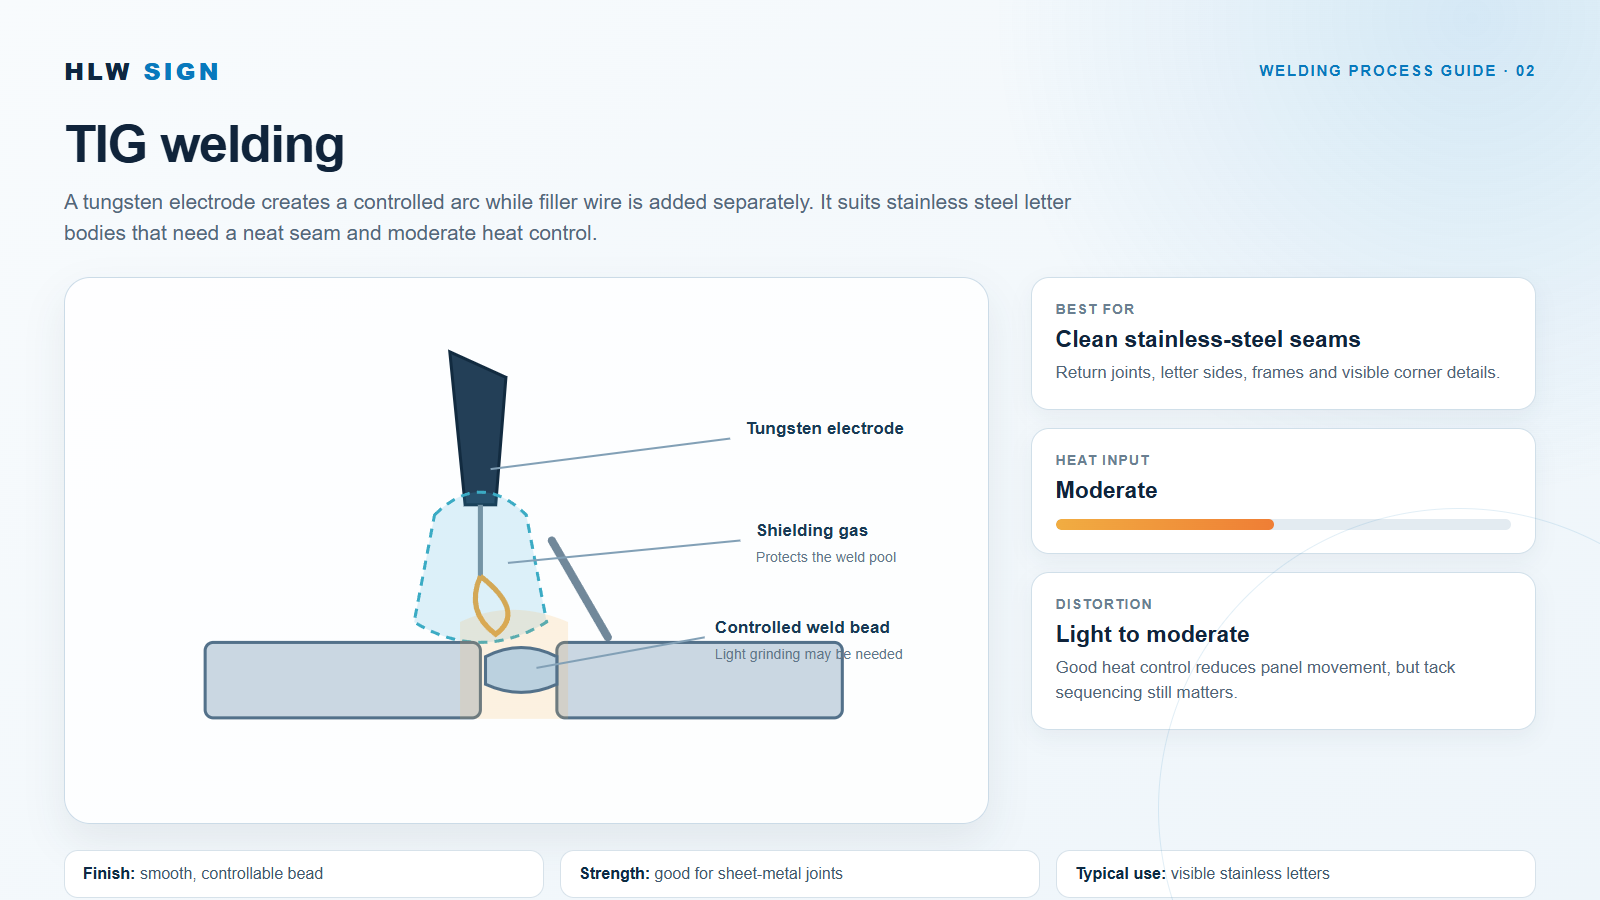
TIG welding uses a non-consumable tungsten electrode and a separate filler rod. The welder can control arc movement and filler addition independently, which is useful when the seam is visible, the metal is thin or the joint changes direction around a letter return.
For custom stainless steel metal signs and letters, TIG welding is often a practical balance between appearance, control and production speed. It can produce a neat seam on letter sides, welded corners, small frames and medium-size fabricated forms. The heat input is higher than laser welding, so tack sequencing and clamping remain important to limit light or moderate deformation.
TIG welding advantages
- Clean, controllable weld bead on stainless steel.
- Good access for filler control at corners and changing joint angles.
- Less spatter than MIG/MAG or stick welding.
- Works well on visible sheet-metal seams with proper finishing.
TIG welding limitations
- Slower than MIG/MAG on long or highly structural joints.
- Result depends heavily on welder technique.
- Heat can still pull thin panels if the tacks and sequence are poorly planned.
MIG/MAG welding: faster joints for larger letters and frames
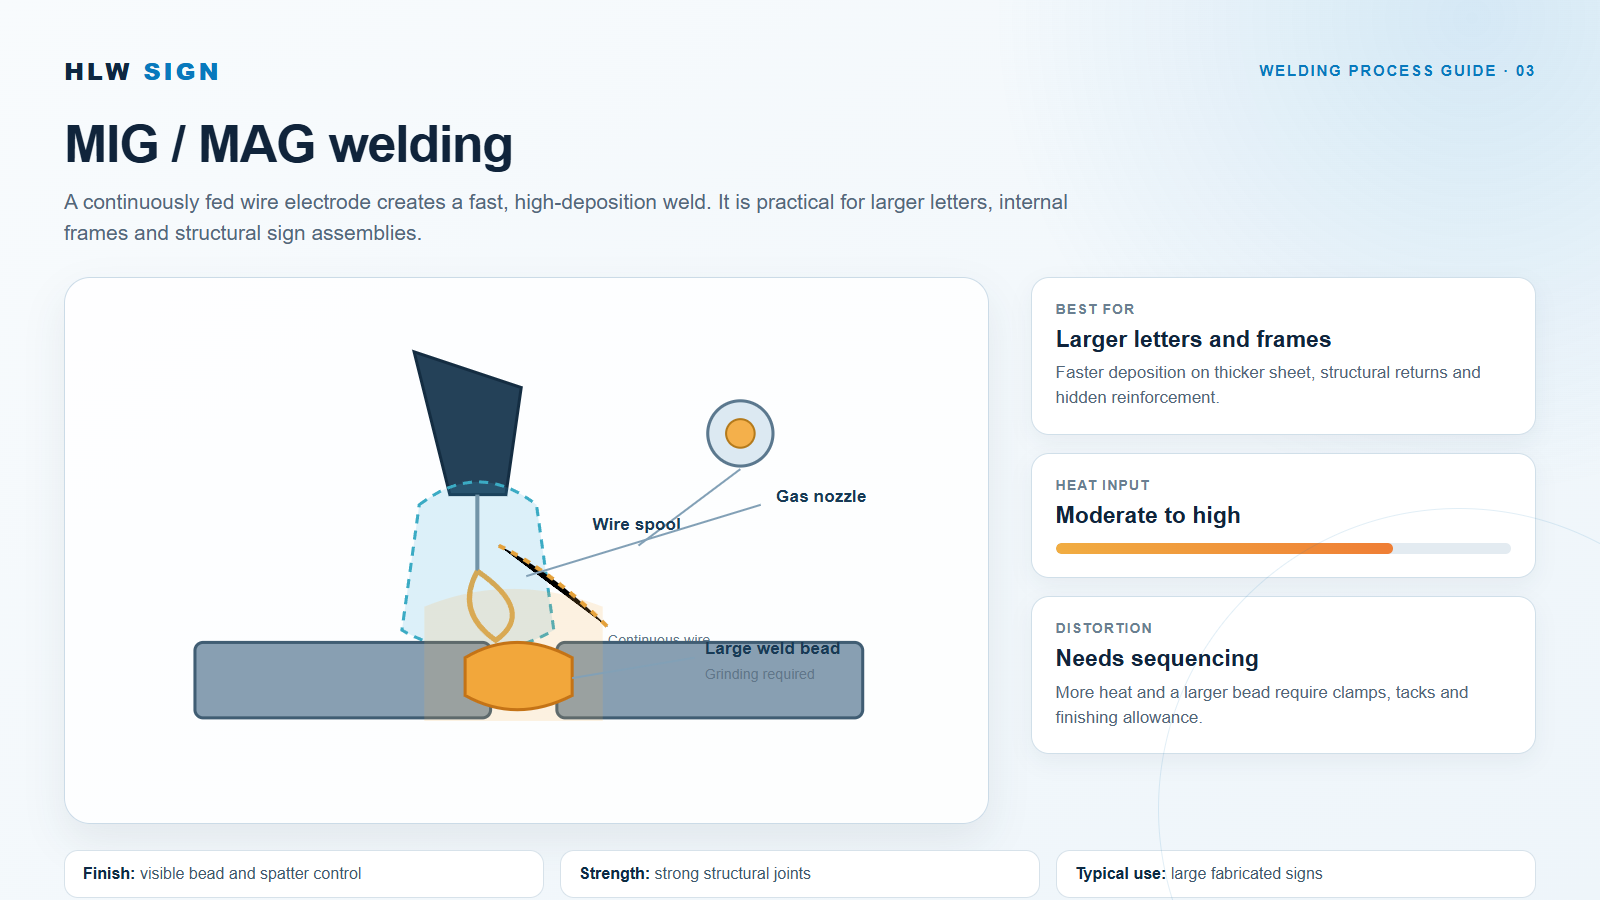
MIG/MAG welding uses a continuously fed wire electrode and a shielding gas or gas mixture. It is faster and more economical on thicker sheets and long seams than TIG, making it useful for large fabricated letters, deep returns, channels and internal support frames.
In a complete guide to LED channel letters, the construction process should separate visible cosmetic welds from hidden structural welds. MIG/MAG can provide strong structural joints, but the larger heat-affected zone, wider bead and possible spatter need to be planned into clamping and finishing. A face that will be mirror-polished should not be welded from the visible side unless the fabricator can grind and refinish it correctly.
The process is also common in factories producing custom channel letters from China, where repeatability and production speed matter. Ask for the weld location, grinding standard and surface finish—not just the word “MIG welded.”
MIG/MAG advantages
- Fast deposition on thick sheet and long joints.
- Strong structural connections when the procedure is correct.
- Efficient for larger letters and hidden frames.
- Continuous wire feed reduces some stopping and restarting.
MIG/MAG limitations
- Higher heat input and greater distortion risk.
- Visible bead and spatter require grinding.
- Gas flow, wire condition and travel speed must be controlled.
- Not ideal for very small cosmetic seams without extra finishing.
Stick welding: heavy-duty joints for hidden sign structures
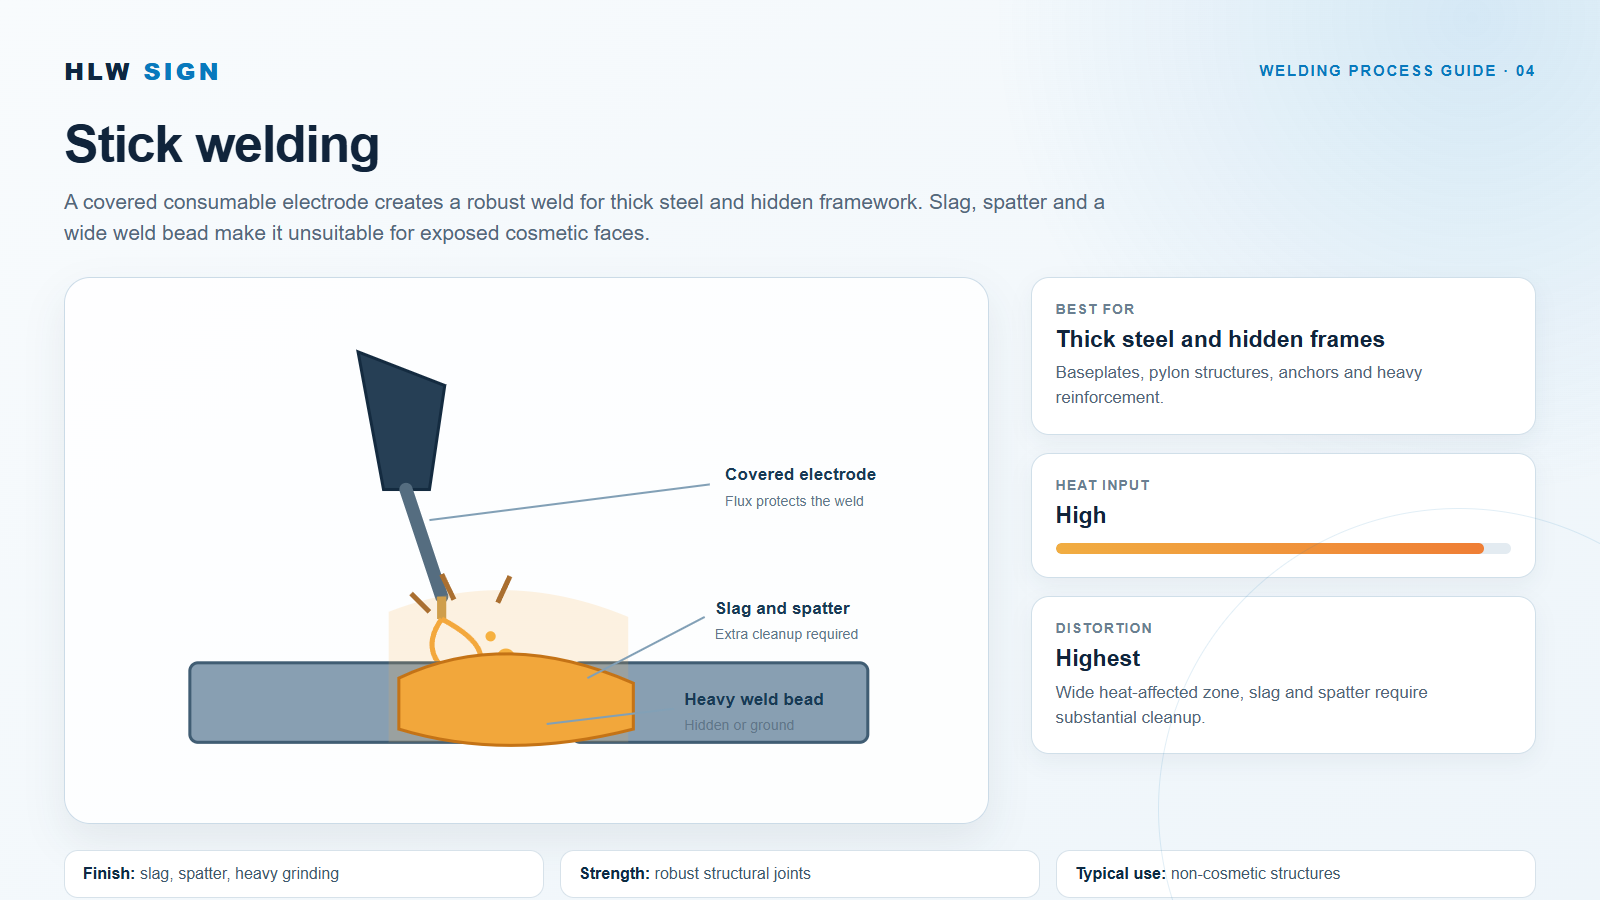
Stick welding uses a covered consumable electrode that melts to form the weld while the coating creates shielding gas and slag. It is durable and practical for thick steel, outdoor repairs and structural work where portability or deep penetration matters.
In signage, stick welding is best reserved for hidden baseplates, pylon frames, anchor assemblies and heavy reinforcement. It can create strong structural welds, but the heavy bead, slag and spatter make it a poor choice for a visible stainless letter face. For a sign that will be installed on a roadside structure or must resist high wind loads, the structural welds should be engineered and inspected separately from the cosmetic face welds.
Compare the completed structure with the relevant outdoor signs engineering requirements and the site-specific structural drawings. A visually clean face does not compensate for an under-designed frame.
Stick welding advantages
- Robust welds on thick steel and heavy sections.
- Portable and practical for site repairs.
- Useful where the weld will be hidden or heavily ground.
- Less sensitive to wind than gas-shielded processes in some outdoor work.
Stick welding limitations
- Slag, spatter and a heavy weld bead.
- High heat input and greater distortion.
- Significant cleaning and finishing time.
- Poor cosmetic result on visible sheet-metal faces.
Which welding process fits which sign application?
Small letters and fine text: laser first
For small stainless letters, narrow strokes, close spacing and detailed counters, laser welding usually gives the cleanest result. It keeps the heat-affected zone small and helps preserve flatness before polishing.
Medium letters and visible stainless seams: TIG
TIG is a practical choice when the seam is visible, the fabricator needs to control filler addition and the part is not so small that laser fit-up becomes the limiting factor.
Large letters and structural returns: MIG/MAG
MIG/MAG is efficient for larger letters, deep returns and hidden support connections. The visible seam must be positioned, ground and refinished as part of the specification.
Hidden frames and heavy steel: stick
Use stick welding for thick steel, baseplates and structural reinforcement where the weld can be hidden or fully cleaned. Do not judge this process by bead appearance alone; inspect penetration, joint preparation and structural design.
Welding and the final sign finish
Welding is only one stage of the finished product. The surface preparation, grinding sequence and coating system determine whether the sign looks consistent after installation. For custom storefront signs, a poorly blended weld can become more visible after painting or polishing than it was before finishing.
Material grade also matters. The steel, aluminium and stainless-steel material guide explains why 304 stainless may be sufficient inland while 316 stainless and matching fasteners are often preferable near salt water. The welding procedure and post-weld cleaning must be compatible with the selected alloy.
After grinding, stainless steel may require cleaning and passivation to remove iron contamination and restore corrosion resistance. If the sign will be coated, compare the powder coating and fluorocarbon paint options before approving the finish. A coating cannot hide unstable weld preparation or trapped contamination.
For the complete fabrication sequence—artwork, cutting, forming, welding, finishing, illumination and packing—see the guide on how to make a sign. If the letters include a halo effect, check the backlit letter halo gap before the final assembly. Weld distortion can change the standoff and make an otherwise uniform halo look uneven.
Quality checks before approving welded letters
- Approve the joint location. Mark whether each weld is cosmetic, structural or hidden.
- Check fit-up before welding. Gaps and mismatched edges become visible after polishing or painting.
- Confirm the process and filler. The drawing should identify the welding method and compatible filler or wire.
- Inspect flatness after cooling. Check faces and returns after the weld has fully cooled—not immediately after welding.
- Review the inside and outside. A clean exterior can hide rough internal welds that affect strength or service access.
- Approve the finishing sample. Compare brushed, mirror, painted or plated areas under the actual lighting.
- Protect welded surfaces during transport. Grinding, polishing and packing must not reintroduce scratches or contamination.
Frequently asked questions
Is laser welding strong enough for exterior signs?
Laser welds can be strong when the joint design, penetration and material thickness are appropriate. For structural frames, the engineer or fabricator should specify the weld procedure rather than assuming a cosmetic laser seam carries the full wind load.
Why can’t stick welding be used on every visible letter?
It can be used structurally, but the slag, spatter and wide bead are difficult to blend on an exposed face. It is normally reserved for hidden reinforcement or parts that will be heavily ground and refinished.
Does TIG always produce a better finish than MIG?
Not automatically. A skilled welder can produce a good MIG finish on the right joint, while poor TIG work can still distort or discolour a panel. Fit-up, heat control and finishing determine the final appearance.
Which process should I request for small stainless letters?
Ask for laser welding when the letters have fine strokes, close spacing or a highly visible seam. TIG can also be appropriate when the geometry, quantity and finishing method favour manual control.
Final recommendation
Use laser welding for precision, small letters and minimal distortion. Use TIG for controlled stainless-steel seams on medium construction. Use MIG/MAG for larger letters and frames where speed and structural capacity matter. Use stick welding for thick steel and hidden reinforcement. The best specification combines the right process with joint design, clamping, finishing and inspection—rather than selecting a process by weld appearance alone.
References and further reading
- Laser welding — process principles and applications.
- Gas tungsten arc welding — TIG process fundamentals.
- Gas metal arc welding — MIG/MAG process fundamentals.
- Shielded metal arc welding — stick welding fundamentals.
- OSHA welding and cutting safety — workplace safety requirements.
- American Welding Society — welding standards and professional resources.
Need a welded sign specification? Send the vector artwork, dimensions, metal grade, installation location and finish requirements. We can recommend a construction that separates cosmetic welds from structural welds and matches the required appearance.