


Quick answer: Finishing a stainless-steel sign weld requires more than grinding the bead flat. The fabricator must inspect the joint, remove spatter, grind without thinning the sheet, blend the repair into the original grain, clean contamination and restore corrosion resistance through appropriate passivation. Visible cosmetic seams need a different finishing sequence from hidden structural welds. Final acceptance should compare the treated area with an approved sample under raking light—not judge it from a photo taken at a distance.
Two stainless channel letters can use the same 304 or 316 sheet and the same TIG process, yet one looks like a continuous formed profile while the other shows a dark halo around every repaired corner. The difference is weld finishing. This guide covers the practical sequence for deburring, grinding, grain blending, polishing, cleaning and passivation on mirror and brushed stainless backlit letters.
Why does weld finishing decide the final sign quality?
A weld joins the metal, but the finishing operation determines what the customer sees and how the surface behaves outdoors. Grinding changes the surface topography. Heat changes oxide colour. Steel or iron particles from an abrasive can become embedded in the stainless surface and later appear as corrosion spots. Coating, polishing or brushing cannot repair a seam that is undercut, porous or excessively thinned.
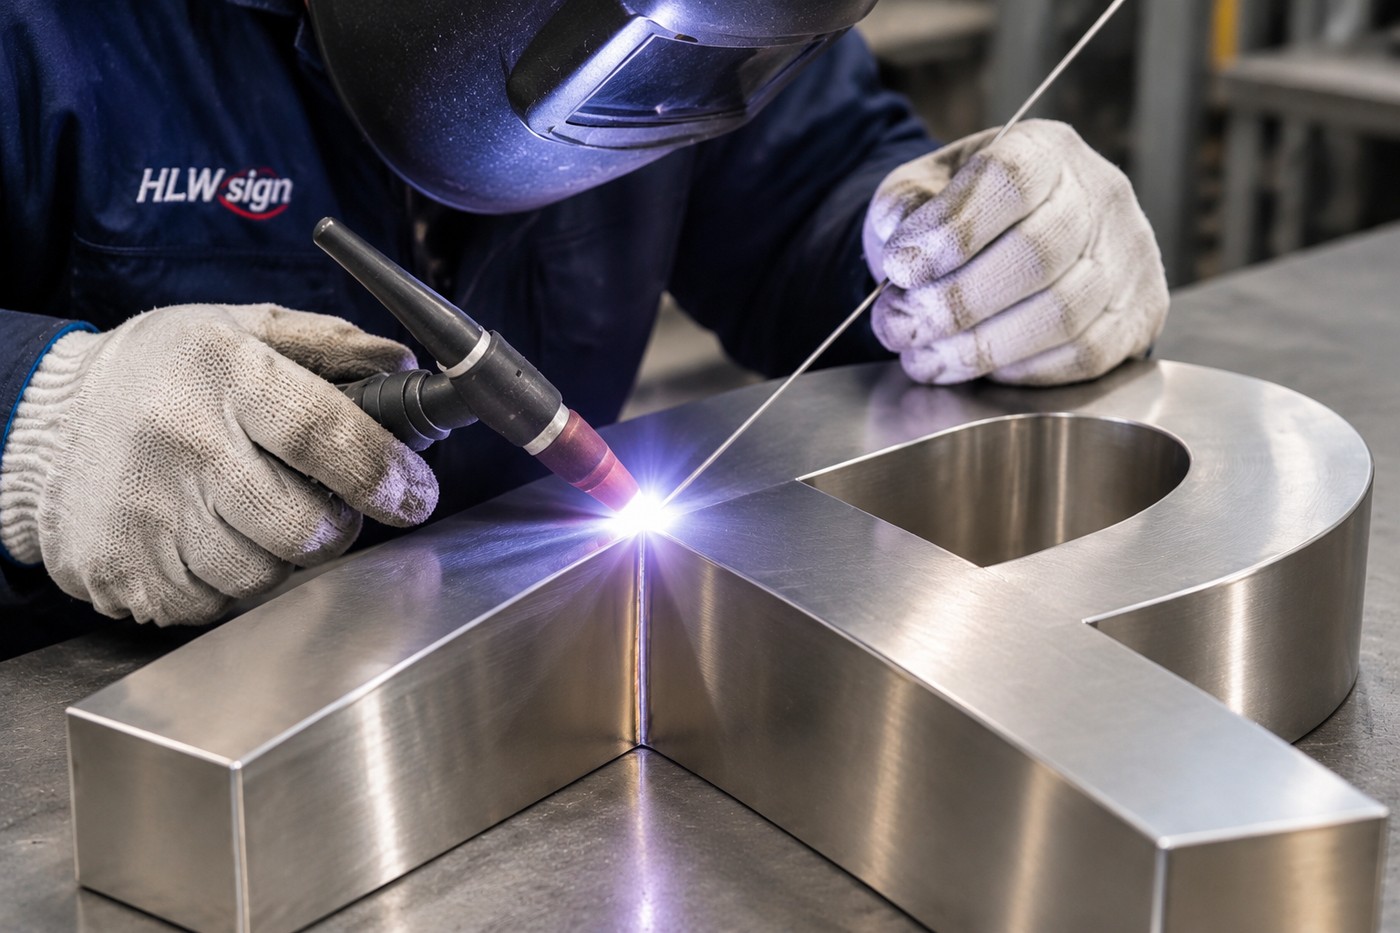
Weld appearance also depends on the earlier process choice. The existing guide to laser, TIG, MIG/MAG and stick welding for metal signs explains where each process belongs. Laser and TIG usually reduce cleanup on small visible seams; MIG and stick may be practical for hidden frames but often require heavier dressing.
Grinding, blending and polishing are not the same operation
| Stage | Purpose | Typical risk |
|---|---|---|
| Weld inspection | Find cracks, undercut, spatter, pinholes and insufficient penetration | Hiding a structural defect under cosmetic grinding |
| Grinding | Remove excess bead, spatter and high spots | Over-thinning the sheet or creating deep gouges |
| Blending | Match the repair area to the surrounding brushed or polished surface | Changing grain direction or creating a visible polishing halo |
| Cleaning/passivation | Remove contaminants and restore the passive stainless surface | Using incompatible acids, poor rinsing or leaving abrasive residue |
| Inspection | Approve colour, texture, flatness and reflected-light appearance | Approving only from one viewing angle or a low-resolution photo |
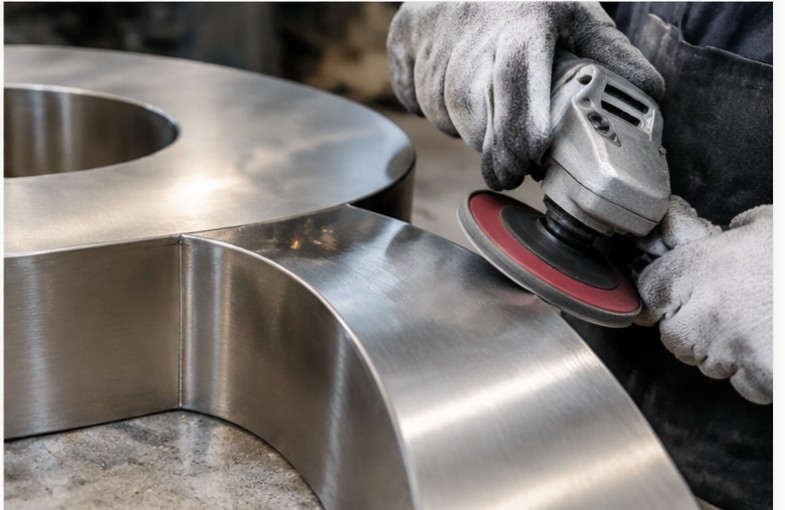
For a brushed surface, “blending” may be more important than “polishing.” A mirror-polished patch on a brushed letter looks wrong even when the metal is perfectly smooth. For a mirror finish, every scratch direction becomes visible, so grinding marks must be removed progressively with finer abrasives.
How should a visible stainless weld be finished?
- Protect the adjacent surface. Mask areas that should not be scratched, but remove all adhesive before heat, coating or final cleaning.
- Inspect before grinding. Confirm that the seam is sound, continuous and free of trapped spatter or unfilled gaps.
- Remove heavy spatter separately. Cut or knock it away before using the finishing disc; dragging loose metal across the face creates deep scratches.
- Use a controlled grinding sequence. Start with the finest abrasive that will remove the high spot, keep the tool moving and avoid concentrating heat in one area.
- Blend beyond the immediate weld. Feather the repair into the surrounding surface rather than leaving a hard transition.
- Match the original texture. Use the appropriate non-woven pad, flap wheel or polishing sequence in a consistent grain direction.
- Clean the area. Remove abrasive residue, oils, marker and any iron contamination through the approved stainless cleaning process.
- Passivate when required. Select the method from the alloy, finish and applicable specification; do not treat acid passivation as a universal wipe-on cleaner.
- Re-inspect after drying. Check reflections, grain, flatness and discolouration once the surface is clean and dry.
How do you match brushed grain without a visible repair patch?
The original grain direction is the reference. If the letter face was brushed horizontally, the repair should follow the same direction. Rotating a pad through 90 degrees creates a bright cross-grain patch that becomes obvious under reflected light. The abrasive grade should be chosen by testing on a matching offcut—not by changing the grade repeatedly on the customer-facing part.
Keep a sample of the approved steel and finish in the production file. A sample bypasses vague descriptions such as “standard brushed” and “same as before.” Under raking light, compare the repaired area with an untouched section of the same sheet. Move both parts through several viewing angles because brushed metal can look uniform from the front and show every transition at an oblique angle.
On thin faces, excessive pressure can dish the panel. On mirror material, a grinder that is perfectly acceptable for a hidden return may create a visible low spot. Restrict aggressive grinding to non-cosmetic areas and use a controlled progression for visible surfaces.
When should a weld be mirror-polished?
Mirror polishing is practical when the joint can be fully dressed and the fabricator can remove each preceding scratch stage. It is more than polishing the weld itself: the heat-affected zone, adjacent sheet and transition must all reflect light consistently.
A polished stainless seam is a high-visibility surface. Small undercut, a slightly wavy edge or a trapped particle becomes difficult to correct after final polishing. For these projects, approve the joint placement and weld method before production. The material guide to steel, aluminium and stainless steel signs is relevant because 304 and 316 do not always finish or perform the same way in coastal environments.
Why does passivation matter after grinding?
Stainless steel relies on a thin passive oxide layer for corrosion resistance. Grinding introduces new metal, heat and possible contamination. Carbon-steel brushes, shared abrasives, shop dust and iron particles can reduce the surface’s ability to remain passive.
Cleaning and passivation should follow a documented process appropriate to the alloy and finish. ASTM standards distinguish between cleaning and chemical passivation, and they do not remove embedded iron or heat tint equally. A supplier may perform cleaning without a full passivation step, so the purchase specification should state what is actually required.
This is especially important for 316 stainless signs exposed to salt spray and for letters that will be packed soon after fabrication. Trapped moisture in a closed container can turn small residue into a visible stain before installation.
How does coating change the finishing requirement?
A coating can hide minor scratches, but it cannot hide a sharp high spot, unstable residue or a seam that continues to trap moisture. Before electrostatic powder coating or fluorocarbon painting, the weld should be sound, clean and flat enough that the coating remains continuous.
Compare the electrostatic coating and automotive fluorocarbon paint systems before deciding whether the stainless surface should remain exposed or be painted. If the coating is specified, check edge coverage, pretreatment and masking because the finishing process changes the acceptable surface texture.
What should be inspected before packing?
- Weld continuity and freedom from visible undercut, porosity or cracks.
- Flatness of the face and return after cooling and grinding.
- No visible scratch, gouge or dished area around the repaired seam.
- Grain direction and reflection consistent with the approved sample.
- Clean corners, counters and internal returns where abrasive debris can remain.
- No water spots, acid residue, adhesive or metal particles after final cleaning.
- Protective film or interleaving appropriate for the selected finish.
- Packing that prevents finished parts from rubbing during transport.
Inspect the complete assembly rather than only the repair. A perfect weld patch can still conflict with a backlit letter halo gap or with the mounting condition shown in the channel-letter installation guide. The packing and shipping guide should be part of the same handoff, because a finished stainless face can be damaged by ordinary movement inside a wooden crate.
What are the most common finishing failures?
The most common failures are over-grinding a thin sheet, dragging contaminated abrasives across the surface, polishing in the wrong direction, leaving heat tint in a joint and applying a coating over oil or dust. Another common problem is specifying “brushed finish” without defining grain, direction and acceptable variation. A photograph from one metre away rarely shows the detail that a customer will see under a storefront downlight.
Finishing also has limits. Deep undercut cannot be made stronger by cosmetic polishing. A severely warped sheet may not return to flat through grinding alone. If the weld is structurally unsuitable, the correct response is to repair or remake the joint—not to spend more time hiding it.
Frequently asked questions
Can brushed stainless be repaired without seeing the weld?
Often yes, if the weld is small, sound and blended in the original grain direction. The repair remains more visible on mirror surfaces and on thin panels that lost flatness.
Should a visible TIG weld be polished or brushed?
Match the specified parent finish. Brushing is usually appropriate for brushed letters; mirror products require a polishing sequence that removes all previous scratches.
Does passivation remove every heat-tint colour?
No. Chemical passivation primarily removes free iron and supports the passive layer. Heavy heat tint may require pickling, mechanical removal or another approved treatment.
Can powder coating hide a poor weld finish?
It hides some colour variation, but it also reproduces high spots, dents and contamination. Coating is not a substitute for correct weld dressing.
How should the customer approve the finish?
Approve a physical sample or high-resolution images taken at multiple angles under comparable lighting, and record the accepted grain, gloss and weld location in the order specification.
Final recommendation
Treat finishing as part of welding, not as a final cosmetic repair. Inspect the joint, remove excess material without thinning the sheet, blend the repair into the original grain, clean and passivate the stainless surface, and inspect the result under realistic light. For visible letters, separate cosmetic standards from structural requirements. That approach protects both the appearance and the long-term corrosion performance of the sign.
References and further reading
- OSHA welding and cutting safety — hazards and protective controls.
- American Welding Society — welding standards and inspection resources.
- ASTM International — standards for cleaning and passivation.
- Nickel Institute — stainless-steel corrosion and fabrication guidance.
- Specialty Steel Industry of North America — stainless-steel finishing resources.
Need a welded finish reviewed? Send the alloy, letter dimensions, visible seam location, construction method, finish sample and installation environment through the HLW SIGN project contact page. The fabrication method can then be matched to what must be hidden, blended, polished or packed.