


Backlit letters look simple from the street: a dark letter, a soft glow on the wall, no bright face. The performance is decided behind the letter, where the acrylic back panel, LED layout and mounting detail meet. The panel thickness affects rigidity, light diffusion, weight and installation, while the LED color temperature decides whether the halo feels warm, neutral or clinical.
This guide covers the common 5, 10, 12, 15 and 20 mm acrylic back panels, the color temperatures that work indoors and outdoors, and the installation methods that keep a halo even and weather-tight.
What Is a Backlit Letter?
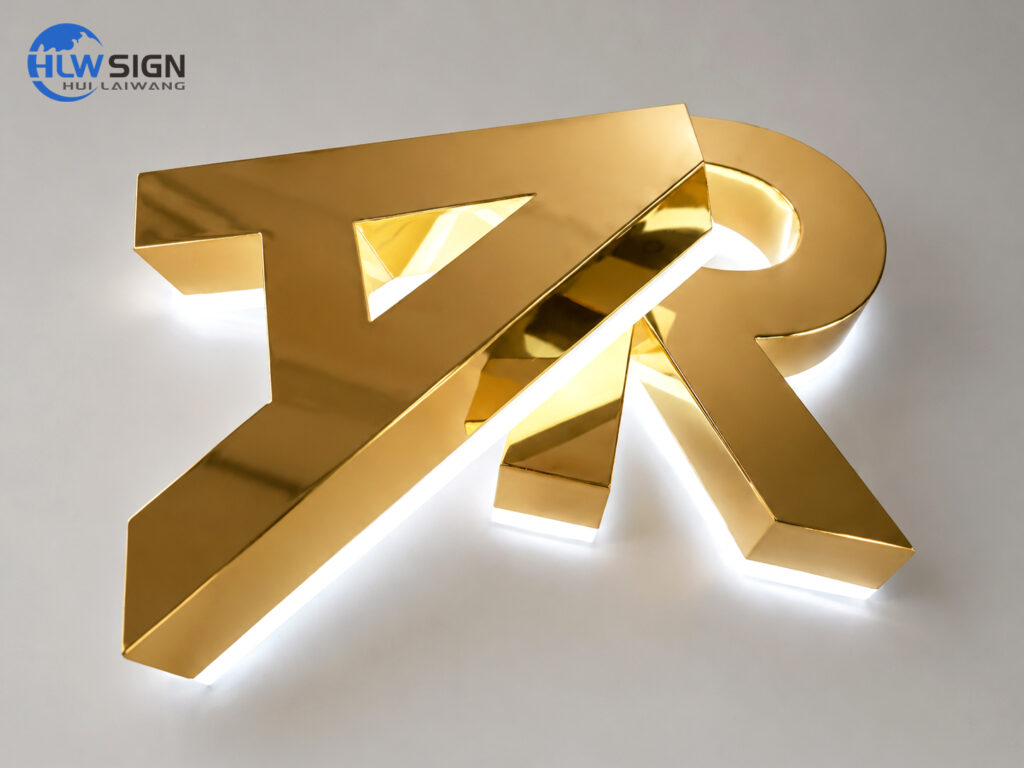
A backlit letter is a dimensional letter with LEDs mounted behind the return, facing the wall. The light reflects off the wall and creates a halo around the letter instead of illuminating the face. The acrylic back panel closes the letter, diffuses the LEDs and helps control the spread of the glow.
The effect depends on three things: the gap between the letter and the wall, the LED spacing and output, and the acrylic back panel. A tight gap gives a crisp outline; a larger gap gives a softer, wider halo. A panel that is too thin can warp or show hot spots; a panel that is too thick adds weight and cost without automatically improving the look.
Backlit letters are used on storefronts, reception walls, hotel facades, office lobbies and building entrances. They can be single-sided or double-sided, and they can be combined with a raceway or individual standoffs. Our backlit channel letters range covers both approaches.
Why Acrylic Thickness Matters
Acrylic is not just a cover. It is a structural and optical part of the letter. Thickness affects:
- Rigidity and flatness. A thicker panel resists bowing over a wide letter and holds a more consistent wall gap.
- Light diffusion. A thicker panel can spread the LED points more evenly, but it also absorbs a little more light. The LED layout still has to be designed for the panel.
- Weight. Thicker acrylic is heavier, which changes the mounting load and the handling risk during installation.
- Cost. Sheet price, cutting, polishing and freight all rise with thickness. The cheapest panel is not always the lowest installed cost if it needs extra backing or fails in service.
- Thermal behaviour. A sealed letter needs a heat path. Thickness alone does not solve overheating; LED current, ventilation and driver placement still matter.
Sheet material for signage is commonly specified against standards such as ASTM D4802, which covers PMMA acrylic plastic sheet. For a backlit sign or a large exterior letter, ask for the sheet grade, thickness tolerance and UV/weathering data, not just a colour sample.
5, 10, 12, 15 or 20 mm: Which Thickness Should You Use?
There is no universal “best” thickness. The right panel depends on letter size, stroke width, return depth, LED spacing, wall gap and mounting. The notes below are practical starting points, not a substitute for a shop drawing.
5 mm Acrylic Back Panel
Five millimetres is a light panel for small indoor letters with short spans. It keeps weight and cost down and is easy to handle. It is not a good choice for a large unsupported back panel: it can bow, show LED hot spots or flex during installation. If a 5 mm panel is used, the letter usually needs a frame, a backing plate or closely spaced fixings.
10 mm Acrylic Back Panel
Ten millimetres is a common middle ground for medium indoor and sheltered outdoor letters. It offers more rigidity than 5 mm without the weight of a thick panel, and it gives the diffuser more room to spread the light. It suits storefront logos, reception signs and letters with a moderate span.
12 mm Acrylic Back Panel
Twelve millimetres is a practical step up for larger letters and wider spans. The extra stiffness helps keep the back panel flat and the halo consistent. It is a good fit for exterior letters that need more resistance to handling and wind load, provided the return and fixing points are designed for the weight.
15 mm Acrylic Back Panel
Fifteen millimetres suits large exterior letters, long spans and projects where the panel must stay flat across a wide opening. The trade-offs are weight, cost and mounting load. A 15 mm panel should be supported by a proper frame or raceway; it should not be hung from the letter return alone.
20 mm Acrylic Back Panel
Twenty millimetres is for very large custom letters or projects with unusual structural or optical requirements. It is heavier and more expensive, and it is not automatically better. A 20 mm panel can be the right answer when the span and support demand it, but many large letters perform well with 12–15 mm when the frame and LED layout are designed correctly.
| Thickness | Typical use | Rigidity | Weight | Key check |
|---|---|---|---|---|
| 5 mm | Small indoor letters, short spans | Low | Light | Needs backing or close fixings; watch for bowing and hot spots |
| 10 mm | Medium indoor and sheltered outdoor letters | Medium | Moderate | Good balance; confirm LED spacing and return depth |
| 12 mm | Larger letters and wider spans | Medium-high | Moderate-heavy | Check fixing points and wind load |
| 15 mm | Large exterior letters and long spans | High | Heavy | Frame or raceway required; plan lifting and service access |
| 20 mm | Very large custom letters or special structural needs | Very high | Very heavy | Engineering review; not a default upgrade |
Also check the channel letter sizes and stroke widths before choosing a panel. A narrow stroke cannot carry a thick panel and a large LED module at the same time; the letter may need to be enlarged or the return redesigned.
Color Temperature for Indoor and Outdoor Backlit Letters
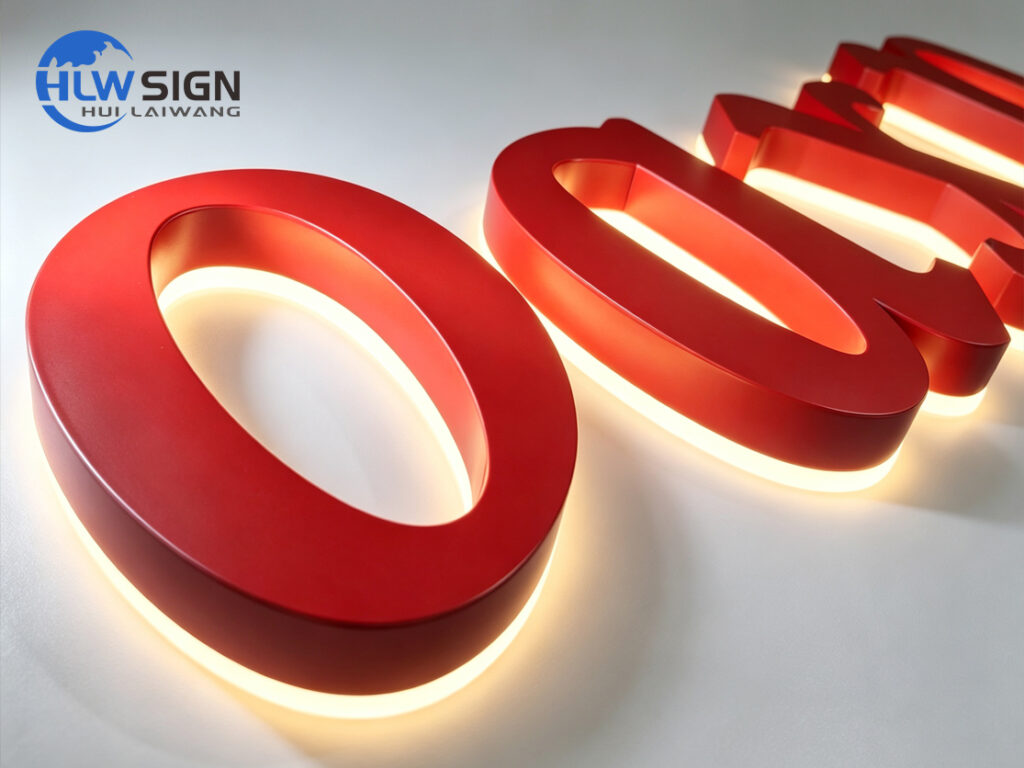
Color temperature describes the warmth or coolness of white light, measured in kelvin (K). The color temperature scale runs from warm amber (about 2700K) through neutral white (about 4000K) to cool daylight (5000–6500K). A warmer halo feels intimate; a cooler halo feels crisp and technical.
- 2700–3000K warm white: hotels, restaurants, boutiques, residential lobbies and heritage facades. It pairs well with brass, bronze, gold and warm stone.
- 3500–4000K neutral white: retail, offices, mixed-use buildings and modern reception walls. It is a safe default when the brand has no strong warm or cool bias.
- 5000–6500K cool white: healthcare, industrial, transport and high-visibility locations. It reads as clean and technical, but can feel clinical on a hospitality facade.
For outdoor letters, 3000–4000K is often the most versatile range: it stays legible in rain and dusk without turning the facade blue. Cooler 5000K+ can work for high-contrast wayfinding or modern architecture, but it should be tested against the wall material and surrounding lighting. The backlit letter color temperature guide explains how wall colour, distance and LED bins change the final look.
Specify the colour temperature, CRI and LED bin together. Two “4000K” LEDs from different bins can look different beside each other. Ask for a mockup or a sample letter before production, especially when the sign sits next to warm interior lighting or a coloured facade. UV exposure can also shift the appearance of the acrylic and the LED over time; ASTM G154 is a common UV exposure test method to discuss with the sheet supplier.
Installation Methods for Backlit Letters
The installation method decides the halo gap, the structural load and the service access. Three common approaches are:
- Flush mount: the letter sits close to the wall. The halo is tight and crisp, but the wall must be flat and the fixing must be precise.
- Standoff mount: the letter is held away from the wall on fixed standoffs. The larger gap gives a softer halo and makes cleaning easier, but the standoffs must be engineered for wind load and weight.
- Raceway mount: the letters are mounted on a horizontal or vertical raceway that carries wiring and drivers. It simplifies wiring and service access, and it is common on larger exterior signs.
Whatever the method, start with a 1:1 template and check the wall substrate before drilling. Confirm the driver location, cable route, drip loops, gaskets and drainage. For exterior letters, the LED modules, connectors, power supply and enclosure need an ingress protection rating that matches the site; the IEC 60529 standard explains what the IP digits mean. Electrical installation should follow the local code; NFPA 70 (NEC) is a useful reference for wiring and disconnects.
Service access is part of the design. A driver or a failed LED segment should be reachable without removing the whole letter. For a double-sided or suspended application, halo lit letters need a frame that supports both faces and keeps the light gap consistent. Follow a proper channel letter installation sequence rather than improvising on site.
Specification Checklist
- Letter size, stroke and return depth. These decide the minimum panel thickness and the LED layout. A thick panel cannot fix a stroke that is too narrow.
- Acrylic grade and thickness tolerance. State the sheet type, grade and tolerance, not just “10 mm acrylic”.
- LED spacing and output. Confirm the module pitch, drive current and diffuser. The U.S. Department of Energy’s LED Basics explains why the LED, driver and thermal design have to be treated as a system.
- Colour temperature, CRI and bin. Keep all letters in one bin; mixing bins can produce a visible colour difference.
- IP rating and sealing. Specify the rating for the complete assembly, including connectors and drivers.
- Mounting and wind load. Provide a fixing drawing for the wall substrate, standoffs or raceway.
- Service access. Plan a removable panel or accessible driver compartment.
- Mockup and warranty. Approve the halo, colour and brightness on a sample before full production.
For a compact interior application, an acrylic led sign may use a thinner panel and a tighter halo. For a large custom acrylic letters project, the panel, return and mounting should be detailed together.
Common Mistakes
The most common mistake is choosing thickness by habit. A 20 mm panel on a small letter adds weight and cost without improving the look; a 5 mm panel on a wide exterior letter can bow or show hot spots. The second mistake is ignoring the wall gap: the same panel can look tight on one wall and washed out on another.
Other issues include mixing colour temperatures between letters, placing drivers where they cannot be serviced, sealing a letter without a drainage path, and assuming that a thicker panel removes the need for a frame. It does not. The frame, return and fixing points still carry the load.
Frequently Asked Questions
What acrylic thickness is best for backlit letters?
Use 5–10 mm for small and medium letters with short spans, 12–15 mm for larger exterior letters, and 20 mm only when the size, span or structural requirement calls for it. Confirm the choice on a shop drawing.
Is 20 mm acrylic always better?
No. A thicker panel adds rigidity but also weight, cost and mounting load. Many large letters perform well with 12–15 mm when the frame and LED layout are correct.
Which colour temperature is best for outdoor backlit letters?
3000–4000K is a versatile range for most facades. Cooler 5000K+ can suit modern or high-visibility signage, but test it against the wall material and surrounding light.
Can backlit letters be used indoors?
Yes. Indoor letters often use a tighter halo, lower output and a warmer colour temperature. The wall finish matters as much as the LED: a glossy wall reflects the halo differently from a matte wall.
How do I avoid hot spots on the back panel?
Match the LED pitch to the panel thickness and diffusion grade, keep a consistent wall gap and avoid over-driving the LEDs. A mockup is the fastest way to catch a hot spot before production.
How are backlit letters installed?
Common methods are flush mount, standoff mount and raceway mount. The choice depends on the desired halo, wall substrate, weight, wind load and service access. Always use a template and a proper fixing drawing.
Conclusion
Backlit letter performance is a system: panel thickness, LED spacing, return depth, wall gap, colour temperature and mounting all interact. Five to ten millimetres suits smaller letters; 12–15 mm is a practical range for larger exterior work; 20 mm is a custom solution, not a default. Choose the colour temperature for the brand and the facade, and design the installation before the letters are made.
If you are planning a project, send the letter sizes, stroke widths, wall material, viewing distance and desired halo; HLW Sign can review the panel and LED layout and prepare a custom signage proposal with a shop drawing and sample plan.